This is a closer look at one of the art projects in this year's Easter Club. It allows for open-ended creativity as well as honing fine motor skills. I got the idea for it from a Valentine's project at one of my favorite art blogs, Art ist Basic. It is an especially good project if you are limited in time. Grades 1-3 will have no problem finishing in one setting, but kindergarten and preschool made need a little longer.
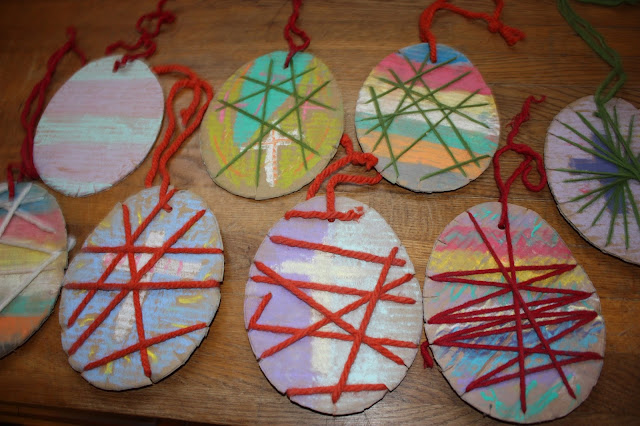

Step 1: Pre-cut the cardboard eggs and make small slits around the border about 2 centimeters apart (which the yarn will fit into). Use the hole puncher to make a hole at the top, so the egg can be hung on an Easter tree. If you have more time and the paper is not too thick, then the children can do this part themselves with an egg pattern, pencil, scissors and hole puncher.
Step 2: Color the front of the egg with the chalk pastels. This works particularly well on cardboard. Whatever paper you use, make sure it has enough "tooth" to pick up the pigments in the pastels.

Step 3: Cut off a long piece of yarn. Starting from the back, wrap the yarn around the egg any way that you wish.

Step 4: Tie the loose ends at the back. Loop another piece of yarn through through the hole at the top, so that the egg can hang on an Easter tree.

Materials needed:
- cardboard or thick paper (needs to be thick enough to withstand the yarn being wrapped around it)
- scissors
- chalk pastels
- yarn
- egg pattern, hole puncher & pencil (optional if eggs are pre-cut)

Step 1: Pre-cut the cardboard eggs and make small slits around the border about 2 centimeters apart (which the yarn will fit into). Use the hole puncher to make a hole at the top, so the egg can be hung on an Easter tree. If you have more time and the paper is not too thick, then the children can do this part themselves with an egg pattern, pencil, scissors and hole puncher.
Step 2: Color the front of the egg with the chalk pastels. This works particularly well on cardboard. Whatever paper you use, make sure it has enough "tooth" to pick up the pigments in the pastels.

Step 3: Cut off a long piece of yarn. Starting from the back, wrap the yarn around the egg any way that you wish.

Step 4: Tie the loose ends at the back. Loop another piece of yarn through through the hole at the top, so that the egg can hang on an Easter tree.
Love these! Thanks for sharing!
ReplyDeleteThanks, Emily!
ReplyDelete